Showing posts with label upcycling. Show all posts

Wednesday, 19 February 2014

Traces Pt 1: A Bag for Miss Harbrow

I created two pieces for Traces at Holdrons of Peckham, both handbags but both very individual. Each bag was intended for  staff member at the department store, and were exhibited in the staff lockers, along with personal items and ephemera that told the story of each of the characters.There is a great feature on it from Design Week here.

The first design I am going to share with you is 'A Bag for Miss Harbrow' - hand embroidery on vintage linen with a Liberty Tana Lawn lining and a sew-in brass colour frame. You can see my inspiration over on my Traces Pinterest board, and the bag in-situ on the Peckham Peculiar blog.


Also, a very big thank you to everyone who donated to the Kickstarter fund as a result of badgering from me :)

Tuesday, 22 January 2013

Tutorial: Caped Crusader


We’ve been in our flat since the beginning of December but until Tuesday had been keeping all our clothes in a suitcase on the floor, not very convenient. Having finally got a wardrobe up to our second floor flat I had a mini purge of my clothes before putting them away, and culled a few plaid skirts for fabric and filled a bag for Oxfam. Amongst my soon to be shredded skirts was this wool blend half-circle (dreams of Mad Men office chic but just too frumpy).

 My initial plan was to hack a bit off to make myself a muff, but having opened the side seam I thought the shape leant itself very well to a little cape-coat. So, I am going to share with you how I made a dowdy skirt into a swish little cover up!
 First up, I removed the zip and the waistband (both worth keeping, never throw anything away!) When you lay the skirt out flat you can see how the shape would work for a cape. In an ideal world I’d have used a full circle skirt, lots of extra volume for swooshing and more room for arm movement, a half circle works just fine though.
 I folded the skirt down the centre and marked the middle on the waist edge, then pinned the skirt onto my mannequin with that centre point lined up at the centre back of the neck. If you’re doing this yourself and don’t have a mannequin I’d advise using yourself instead and having a reliable friend there to help.

 Then, I brought the edge I unpicked round to the front, keeping the grain running straight across (made easier by the check pattern) and pinned to the centre front. Doing this with both edges, lining up the squares, gave me an overlap that was equal on both sides (but a hem that was not, ho hum).


Once this was all pinned in place I had extra fullness around the neck area, easily fixed by putting a dart in each shoulder.


Because I matched the squares, which left me with an uneven hem, I also had an uneven neckline at the front so I copied the curve from the left side and trimmed the right side down to match. I also cut across the line of the darts leaving a 1.5cm allowance.


Next, I unpinned the cape from the mannequin, leaving marker pins in to show CF’s and CB. I used this as a pattern piece to cut my lining. Because the skirt is already hemmed I cut the lining to the same length, so that once the lining is hemmed it will sit shorter than the outer.
These two helped.

 
Next up, I hemmed the lining then stitched my shoulder darts in lining and outer. In the picture they are sewn straight across, but I later altered this to a slight downward curve at the shoulder end to stop it being too pointy. If you fancy you could hand tack some shoulder pads in too.
 At this point it might be an idea to interface the centre front edges of the outer cape, just so far as they overlap, to give a crisper shape and a bit more stability for whatever fastenings you use. I didn’t have any interfacing so I didn’t bother.

The front edges I sewed right sides together, then to stop the lining rolling to the outside I understitched the seams to the lining edge (fold the seams over to the lining side and stitch through all three layers close to the edge from the right side).


Back on the mannequin I pinned the CF and CB back in place and measured the neckline circumference. I could have drawn up my own collar pattern, or just seamed the neck edge and left it collarless. Piping or some other sort of trim would have made a nice finish too, but I had a collar I’d removed from another jacket (also cannibalised for fabric) and luckily it was the exact right size so I sewed that straight in, matching the CB of the cape to the centre of the collar, and understitching the lining as with the front edges.


 I decided to just put a fastening at the top of the opening, and used two press studs with a couple of big vintage buttons on top for detail.  At this point you could stop and you’d have a very nice cape, but I wanted to belt mine in for shape so I used the leftover waistband (you see!) and made a simple belt loop for the centre back, using the mannequin to find the right level for the waist.

The next step is possibly the trickiest, but it makes all the difference. To get that cape-coat effect you need to belt around the front and back but leave the ‘arms’ free, so I made little faced windows, two on the front waist, and two at the back, to thread my belt through.  The method I used is a shortened version of the Bound Buttonhole Tutorial on the Coletterie blog (full of incredibly useful dressmaking tips and techniques, as well as the wonderful patterns they produce). 

Tuesday, 14 August 2012

Hot Off The Press

When I was doing my A Level in Textile Product Design we all had a go at using some fabric that you could feed into an inkjet printer and print onto like paper. I think the technician had to cut the fabric to size and there was a solution you had to soak it in and leave to dry for it to work. Also, you had to feed it into the printer from the back. The results were reasonably successful, but I imagine it was a awful lot of faff and that's why we only ever did it once. Luckily some smart person has simplified the process greatly and you can now buy pre-cut, pre-treated sheets of A4 fabrics, both washable and non washable, and in cotton, linen and silk. Amazing!

I'd been planning to try some out for a while so I ordered a starter pack from this site, which inlcudes an A4 sheet each of cotton, cotton lawn, linen, silk and silk organza. One of the things I wanted to do was try and reproduce my hand embroidery on decorations and accessories. I love embroidering and how fluid it is compared to, say, sewing purses or folding books, but it takes a long time and that increases the final price considerably. I'm not at all against charging lots of money for things when it's justified by the work involved, but I don't want to sit at a stall for hours on end with lots of beautiful things that no one can afford. (sometimes it's hard enough with very reasonably priced work, but when people think a craft market is basically the same as a jumble sale there's not much you can do) Wouldn't it be nice, I thought, if you could have the look of a hand embroidered piece without spending a fortune on it?

As we are over the middle of the year 'hump' it is sadly acceptable for me to start thinking about (whisper it) Christmas. So, my first experiments are of a decidedly festive nature, and for that I apologise. Using some of the leftover linen from my vintage tablecloth and red stranded cotton (and 3 episodes of The Sopranos, and lots of cups of tea, and Poirot) I produced these:

Redwork heart on vintage linen. Lazy daisy, chain stitch, running stitch, french knots and back stitch.
The heart was first and quite restrained. The tree had a couple of false starts in green but the red seemed to make more impact on the white, and I didn't plan any of it out to start with, just added and filled in gaps as I went along. I've found Pinterest to be a great help when looking for embroidery inspiration, partifularly for less formal approaches than you'd find in books on the subject.

Redwork Christmas tree on vintage linen. Chain stitch paper chains, lazy daisy flowers, french knots and running stitch.
 With the embroideries complete I gave them a good iron and then scanned them and uploaded the images to the computer. After a little playing around in Photoshop this morning and a few test prints on paper I was ready to go with the fabric. I used the cotton lawn for these, a nice smooth weave and natural feel. The fabric comes backed with paper and goes straight in your ususal paper tray, paper side up. Set your print quality to Best and away you go! I find it easiest, once you've printed and left for 30mins or so, to mark your cutting lines on the paper and cut them out, then peel the backing off.

 With my printed designs ready I tested two ways of making hanging decorations. First up I used some gorgeous red 100% wool felt from Myriad and wundaweb-ed it to the printed lawn, finishing with a machine stitched edge, I prefer the zigzag, but think either would be better in a white or off white thread so as not to distract. The tree has an extra layer of medium interfacing between the layers too which makes it hang straighter. I like the simplicity of these, but I'm not sure if the tree has too much of the car air freshener about it, what do we think?

Next up I went for a tried and tested 'stitch and stuff' method, using red polka dot cotton for the back. I like the squishy-ness of these, and it's great to substitute the stuffing for lavender or other aromats. I'm currently on the lookout for festive smelling things if anyone has any tips on that? Perhaps steering clear of anything too pine-y as we'll be back in car freshener territory again.


As a start I'm quite pleased with how these have turned out, might have a couple more stabs at this idea and then settle on a final method. The other fabric sheets I have plans for too, there'll be more on those in future.

Today I realised I've also passed the 1000 mark on my blog views, woo hoo! I'll be doing a little giveaway to celebrate that in the next week or so, so stay tuned!

Wednesday, 4 July 2012

Reinvention

A few weeks ago I shared some pictures with you of the beautiful things I found at a vintage fair in Liverpool. I've had a few weeks to play with them and now I thought I'd show you what they've become!
The pair of Liberty curtains and the Sanderson furnishing fabric have become simple shoppers (along with a pretty Ikea floral) It's the first time I've done this style of bag and overall I'm pretty pleased.


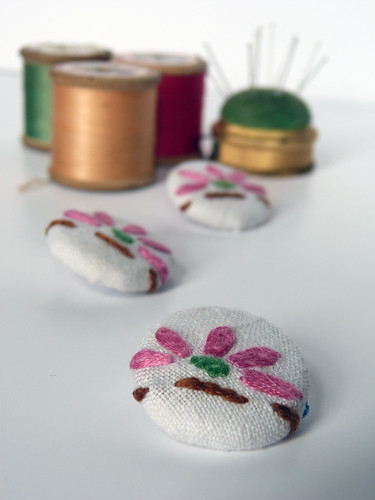
The hand embroidered table cloth has had a few reincarnations. Firsty, these lavender hearts, all with a different patterned cotton on the back and a ribbon and button detail on the front. The little motifs left behind from cutting these out have become covered buttons (and my old threads serve as great dressing for my product shots!) I've got four large panels cut out as well ready to become cushiosn, but more on those another time.

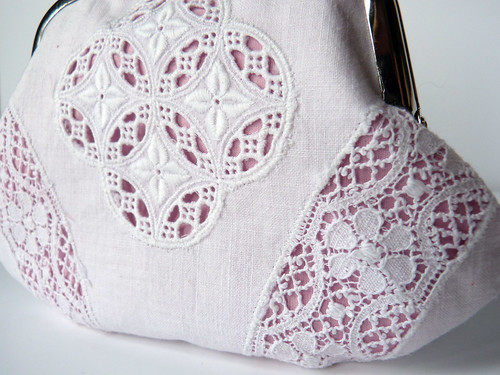
Lastly, one of the lace table runners has become a very delicate coin purse, I used pink cotton behind the lace for a hint of colour and echoed it inside with a pink polka dot lining.

There's plenty more pieces left as well so I'm sure I'll find lots of exciting things to use them for, especially with three big events coming up this summer. This Sunday I'll be at Stalls in the City, an arts market run by Open Culture in Liverpool One outside the Hilton. The first fair I ever took part in was one of these markets last September and it was a great day. I'll also be there on the 4th August and 2nd September, so it you're in the area why not pop down and say hi!
Blogging tips